Keurig needle cleaning is an essential part of running a good high quality maintenance and preventative maintenance function after your initial deep clean and descaling of your coffee maker.
Be sure to clean your Keurig needles at least twice per month when you run a deep clean of your coffee maker.
Keep reading for the full instructions and the protocol that I run.
Keurig Needle Cleaning
Table Of Contents
- 1 Keurig Needle Cleaning
- 2 Keurig Needle Cleaning Tool
- 3 Keurig Needle Cleaning Instructions
- 4 How To Clean Keurig Needle With Paper Clip
- 5 How To Clean Keurig Exit Needle
- 6 Using Your Keurig 2.0 Needle Cleaning Tool
- 7 Running A Full Descaling Cycle
- 8 Keurig Needle Maintenance Still Not Working
- 9 Frequently Asked Questions About Keurig Needle Cleaning
- 9.1 How Do I Deep Clean My Keurig Without Vinegar?
- 9.2 Can I Use Rubbing Alcohol To Clean My Keurig?
- 9.3 Does Baking Soda Clean Keurig?
- 9.4 Do I Need To Clean My Keurig After Every Use?
- 9.5 How Do You Make Homemade Keurig Descaler?
- 9.6 Can I Run Soapy Water Through My Keurig To Clean It?
- 9.7 Do You Remove Foil From Keurig?
- 9.8 Should I Run Straight Vinegar Through My Coffee Maker?
- 10 Final Thoughts – Keurig Needle Cleaning
Keurig needle cleaning and unclogging is a task that needs to be performed regularly, as regular as adding the 5 minute to 10 minute process to your descaling cycle of your coffee maker to ensure that your machine remains in optimal condition for brewing coffee and ensure that your coffee machine never gets a build up of dirt anywhere in your needles or your coffee maker.
At Latte Love Brew, we recommend that you clean your coffee maker by full descaling it, including full Keurig needle cleaning every other week.
Keep reading for the full instructions. There is one special tool that you will need; let’s talk about that for a moment.

Read: How to clean the needle on a Keurig
Keurig Needle Cleaning Tool
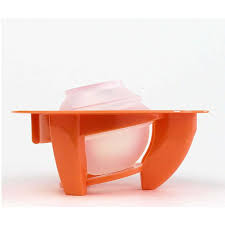
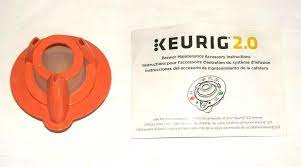
This is the orange Keurig needle maintenance tool that comes with your coffee maker and is needed to clean Keurig needles.
If you have lost your Keurig needle maintenance tool, don’t worry, as it can be easily purchased from eBay, Amazon and the Keurig website.
When it arrives, tape it to the back of your coffee machine to ensure that it doesn’t get lost.
Now, let’s get to the instructions for cleaning your needles.
Keurig Needle Cleaning Instructions
It is very easy to clean both your exit needle and your puncture needle, also known as the entrance needle, as the process for both needles is the same.
Exactly the same. My process goes deeper than what is taught on other sites as I look to clean with a substance to clean the coffee oils and destroy all bacteria on your needles and the tubes leading up to them.
Before you get started, run a couple of hot water only brewing cycles with two complete water reservoirs full of just water. This is to make your job of cleaning and unclogging the needles easier as it loosens and softens the coffee grounds before you start the whole process.
Let’s get to the step of cleaning your needles with a very simple item that you use every single day.

Read: Cleaning Keurig Needle
How To Clean Keurig Needle With Paper Clip
Cleaning your Keurig needle with a paper clip is easy, effortless and more importantly frees the hard stuck coffee grounds and other material that may be clogging and blocking your needles.
Let’s start with the exit needle.
How To Clean Keurig Exit Needle
The exit needle is located below the K cup holder. You will need to remove the pod holder to access it and expose it for the ease of cleaning.
Once you have removed the pod holder, you can take advantage of the moment and clean it with hot water and soap.
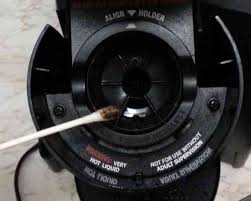
Once you have located the exit needle, insert your unfolded paper clip and poke around inside your exit needle for a minute. Pay attention and be careful not to cut yourself as the needle is sharp.
Proceed to perform the same task on the Keurig puncture needle which is located directly above the pod holder.
At this point you have successfully unclogged your needles and freed up the main cause of any blockages or potential blockages.
Now use a narrow straw and blow hard a few times inside both the entry needle and the exit needle.
Now fill your water tank with fresh water and run a water only hot water brewing cycle to properly flush out the coffee particles and grounds that you have loosened.
Using Your Keurig 2.0 Needle Cleaning Tool
Your cleaning of your needles is not yet complete. All you have done so far is unclog your needles; you have not actually cleaned them.
To clean your Keurig needle cleaning tool, you will need that needle maintenance tool.
Look it out and fill it with hot water, insert it in the pod holder and open and close your brew head 5 to 7 times.
Repeat this process for a second time.
Now for the extra step that I love to take to get your needles properly clean.
Fill the needle cleaning too with a 50% solution of distilled white vinegar and fresh clean water.
Open and close your brew head 5 to 7 times to clean your needles of rancid coffee oil, and all other kinds of dirt. Repeat this process a second time to give your needles a good proper clean.
At this stage, both your exit and entrance needles are unclogged, unblocked and perfectly clean.
All that is required is that you proceed to run a full descaling of your single serve coffee maker.

Read: Keurig needle maintenance
Running A Full Descaling Cycle
Running a full descaling cycle at this stage is an excellent idea as there is no point (pun intended) in having perfectly clean needles when there may be dirt and blockages elsewhere in your coffee maker.
Running a full descaling cycle will get the rest of your coffee machine fully and perfectly clean.
Fill your water reservoir with distilled white vinegar and water in equal ratios to the max fill line and run a full brew cycle.
Ensure that you have a carafe or large coffee mug to catch the solution that comes out and discard it.
Repeat this step for a second time to ensure that any hardened mineral deposits are cleaned and cleared, and any coffee oil build up deeper in your machine has been cleaned and removed.
Run a series of 5 to 7 flushing cycles to rinse your machine completely from all traces of vinegar. To run the flushing cycles simply fill your water reservoir with fresh water to the max fill line and run full brew cycles until it is empty and repeat the cycle 5 to 7 times.
Keurig Needle Maintenance Still Not Working
At this stage your Keurig coffee machine and needles have been fully cleaned, unclogged and unblocked. If your beloved coffee maker is not working, it is possible that there is a more serious issue at hand.
I suggest that you contact Keurigs customer service for advice on what to do next. It may be something simple, or it may be that you need to replace an important internal component like your water pump.
Frequently Asked Questions About Keurig Needle Cleaning
How Do I Deep Clean My Keurig Without Vinegar?
If you want to give your Keurig coffee maker a real good deep clean without using vinegar you have many options open to you as distilled white vinegar is not the only cleaning solution that you can use.
- Citric acid.
- Lemon juice.
- Hydrogen peroxide.
- Bicarbonate of soda.
Are all viable options that you can use, as is Keurigs own descaling solution (which is citric acid based).
Can I Use Rubbing Alcohol To Clean My Keurig?
No, rubbing alcohol, isopropyl alcohol, is not a substance that you should use in your Keurig coffee maker. On its own it’s far too flammable and is a fire risk; diluted with water it is too ineffective to actually clean anything.
Does Baking Soda Clean Keurig?
Yes, baking soda, otherwise known as bicarbonate of soda, is a perfectly good cleaning solution when mixed with water. Add 25% baking soda and 75% fresh water, mix well and add to your water reservoir until it is full.
Run a full descale cycle and repeat. Rinse well with fresh water.
Do I Need To Clean My Keurig After Every Use?
No, it is not essential that you clean your Keurig machine after every use, but it is essential that you clean your coffee maker at least every 2nd week, every 15 days and give it a full deep clean, a full descale to prevent the build up of mineral deposits.
How Do You Make Homemade Keurig Descaler?
Making your own homemade DIY Keurig descaling solution is easy. Mix white vinegar and water in equal parts and fill the water tank to the max fill line.
Run a full descaling cycle and repeat as necessary and then run a full rinsing cycle 5 to 7 times to remove the scent and all traces of vinegar from your Keurig machine.
Can I Run Soapy Water Through My Keurig To Clean It?
No, despite sounding like a good idea to clean your Keurig coffee maker with soapy water, it is in fact a terrible idea. The soap gets everywhere, and it is incredibly difficult to get rid of the bubbles.
Your coffee for a while after may taste a little soapy.
Do You Remove Foil From Keurig?
If you are brewing your coffee, leave the fol lid intact when you put it in your pod holder. Your machine will pierce holes in it prior to brewing.
But when it comes to disposing of your K cups coffee pods, you must remove the foil lid and the coffee grounds.
Should I Run Straight Vinegar Through My Coffee Maker?
Vinegar is a great and very effective cleaning solution that will disinfect your coffee maker as it cleans and descales it. But, you should never run a straight vinegar through your coffee machine.
Vinegar at high temperatures is flammable and may turn your machine into a fire risk. Instead, use an equal amount of water to dilute it.
Final Thoughts – Keurig Needle Cleaning
Keurig needle cleaning is easy, and literally you have no excuse for not cleaning them every time you descale your Keurig as it adds only an extra 5 minutes to the whole process and for those 5 minutes you get a coffee maker that is in optimal condition for brewing you coffee every single time.
Join our fun and friendly coffee community where we talk about coffee beans, brewing methods and share some great recipes. Find us on Facebook/Meta.


