
Learning how to clean Keurig needle and rid it of bacteria, mold and all kinds of gunk, including rancid coffee oils is a task that has to be regularly performed.
It’s easy, effortless and unfortunately very few, in fact, to date, no other coffee blog will tell you what to do to fully sanitize your needle and kill any bacteria living in your needles or the internal times around them.
Keep reading for the details!
How To Clean Keurig Needle
Table Of Contents
- 1 How To Clean Keurig Needle
- 2 Where Is Keurig Needle
- 3 How To Clean Needles On Keurig Supreme Plus And Other Keurig Models
- 4 How To Clean Keurig Exit Needle
- 5 How To Clean Keurig Entrance Needle
- 6 Using Your Keurig Needle Maintenance Tool
- 7 Keurig Needle Maintenance Still Not Working
- 8 Frequently Asked Questions About How To Clean Keurig Needle
- 8.1 Is Vinegar Enough To Clean Keurig?
- 8.2 Why Does My Keurig Needle keep Getting Clogged?
- 8.3 Can You Descale Keurig Without Vinegar?
- 8.4 Does Baking Soda Clean Keurig?
- 8.5 Is There A Cleaning Mode On Keurig?
- 8.6 How Many Times Do You Run Vinegar Through A Keurig?
- 8.7 Why Is My Keurig Not Working After Cleaning With Vinegar?
- 8.8 How Much Vinegar Should I Run Through My Keurig?
- 9 Final Thoughts – How To Clean Keurig Needle
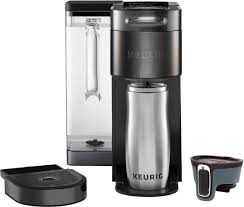
If you want to learn how to clean a Keurig needle and get it properly clean, regardless of which model, be it a Keurig mini, Keurig 2.0, or any other Keurig machine this Keurig needle maintenance guide will show you how to unclog your exit needle, entrance needle, often called the puncture needle and get it cleaner to greater detail than any other guide due to the extra step and care that we take at Latte Love Brew!
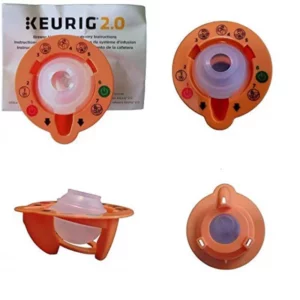
Get looking out your orange needle cleaning tool, let’s get started!
Read: Needle maintenance Keurig 2.0 without tool
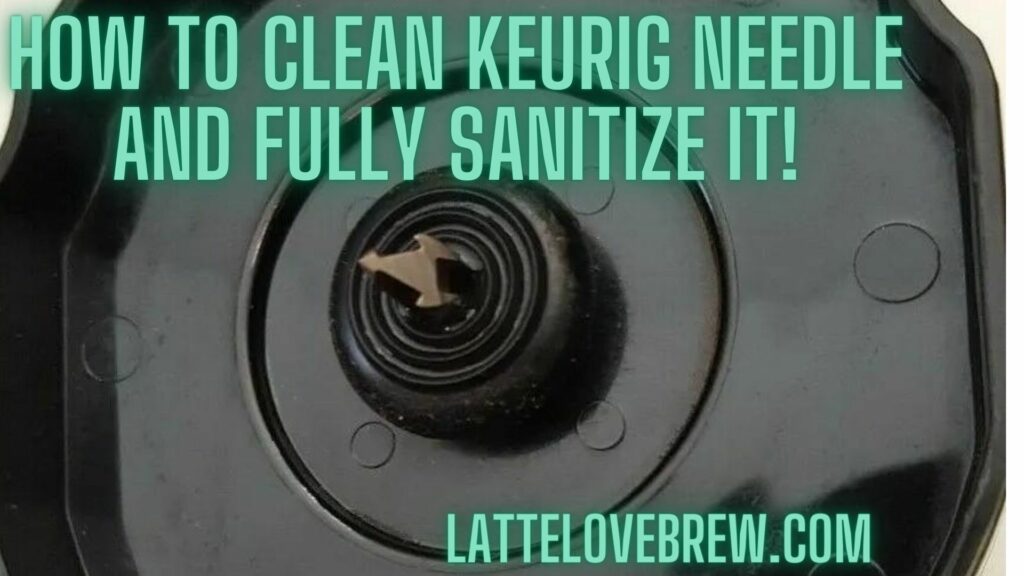
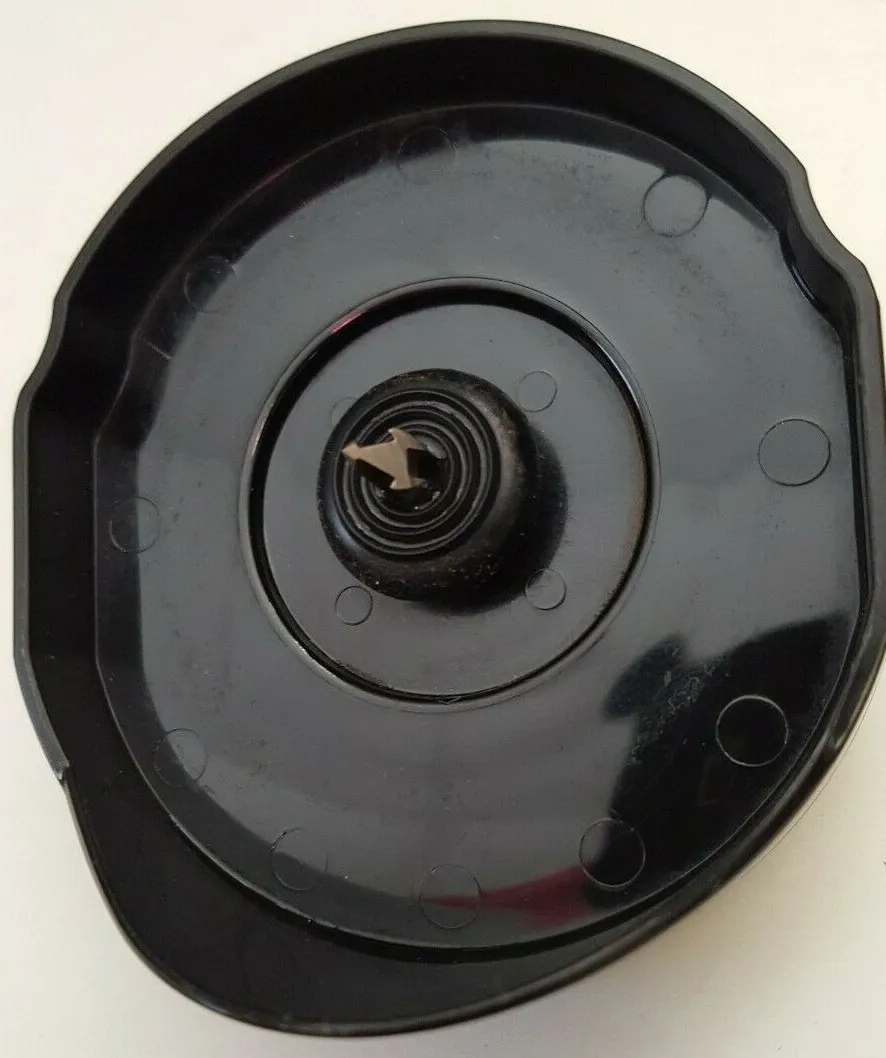
Where Is Keurig Needle
There are two needles on your Keurig coffee maker: an exit needle and an entrance needle which is also known as the puncture needle.
Finding them is easy, very easy. Open up the brew head of your Keurig machine and on the underside of the top half, the part that opens up, you will find the puncture needle.
It should be in the middle directly above where you put your K cup coffee pod.
Remove your K cup pod holder and underneath you will find the exit needle.
Attention: Both of these needles are sharp, very sharp. Due care and attention is required when cleaning them as to not cut yourself or worse.
Let’s get them properly cleaned.
How To Clean Needles On Keurig Supreme Plus And Other Keurig Models
There is nothing difficult or complicated about unclogging and cleaning your needles.
If you have not run a deep cleaning and descaling cycle of your coffee maker in a long time (3 months or more) I suggest cleaning your needles at the start of the descaling program and then again when it is complete.
It would be a shame if you achieved a less than optimal cleaning of your needles and descaling of your coffee machine due to the mineral deposits getting stuck in your needles or among the blockages building up there.
Equipment Needed:
- Keurig needle maintenance tool.
- White cleaning vinegar.
- Paperclip or long thin needle.
Cleaning vinegar is preferred as it is stronger than regular vinegar and will get the job done better and more efficiently. However, if none is available, regular white vinegar or distilled white vinegar will do.
Now, let’s start with cleaning the exit needle.
Read: How to unclog a Keurig
How To Clean Keurig Exit Needle
Cleaning your exit needle is easy; there is nothing difficult or complicated at all. I advise that you practice caution and be careful due to the exit needle being sharp, very sharp.
Start by locating your paperclip and unfolding it, or your thin long needle.
Poke around the inside of the needle for a minute and give your exit needle a good poke around in 360 degree fashion and be careful not to poke too deep.
Pay attention to loosening any debris that is inside the exit needle.
Note your cleaning of the exit needle is not yet complete; just this stage is complete, the loosening of dirt and grime inside your needle.
Now move on to cleaning the entrance needle.
How To Clean Keurig Entrance Needle
Now, the cleaning of your entrance needle. Simply repeat the same process as above, the cleaning of your exit needle and repeat the process and poke around inside of it for approximately one minute to loosen debris.
Using Your Keurig Needle Maintenance Tool
Now is when you start to take advantage of the poking around that you have already previously completed.
Start by cleaning your pod holder and putting it back in its place.
Fill your needle maintenance too with hot water, as hot as you can manage without burning yourself.
Put it in place, where you would put a Keurig K Cup and align it correctly.
Open and close your Keurig brew head 5 to 7 times. This performs a pumping action and cleans both your needles.
Now for the bonus step that I take that will ensure that your needles are as clean as they can be.
Open your brew head, remove the needle cleaning tool. Fill it with 50% cleaning vinegar and 50% water and repeat the action of opening and closing your brew head 5 to 7 times.
Repeat for a second time and refill your needle cleaning tool with the vinegar and water solution, using equal amounts of each liquid.
After this second cleaning your needles will be clean of any coffee oils, grounds and any dirt that may block them.
Above all, any bacteria and mold has been cleared and your needles and the tubes leading up to them have been cleaned and fully sanitized.
Now run a full descaling cycle to clean all parts of your coffee maker internally and remove any dirt, mineral build up or the build up of calcium. limescale and old coffee oils and grounds from deep inside your machine.
Fill your water reservoir with a solution of water and cleaning vinegar in equal amounts and run a full brew cycle until it is empty. Repeat this process for a second time before running a flush cycle.
Run 5 to 7 flushing cycles with fresh water only. Fill your water with only fresh water and run complete brew cycles. Do this 5 to 7 times to free your machine of all traces and scents of vinegar.
Now repeat the whole process of cleaning your needles. This time when you have finished, run two full flushing cycles with fresh water.
Read: Keurig needle maintenance
Keurig Needle Maintenance Still Not Working
If your machine was not working before and only brewing partial cups of coffee and is still not working after running a complete descaling cycle of your whole machine, and proper deep cleaning and unclogging of your needles, it is best that you contact customer support for further assistance.
You may have a problem with the pump or something else with the internal machinery.
Frequently Asked Questions About How To Clean Keurig Needle
Is Vinegar Enough To Clean Keurig?
Yes, distilled white vinegar is a great solution to get your Keurig clean. You must dilute it with an equal amount of water as vinegar is flammable at high temperatures.
Simply fill your water reservoir to the half way full mark and top up with clean water to the max fill line.
Why Does My Keurig Needle keep Getting Clogged?
Your Keurig needle will be getting clogged due to an accumulation of coffee grounds on the puncture needle or the build up of calcium or other minerals inside your Keurig coffee maker.
Can You Descale Keurig Without Vinegar?
Yes, there are multiple options with regards to which cleaning solution you can use; vinegar is just one. Others include:
- Hydrogen Peroxide.
- Citric acid.
- Lemon Juice.
- Keurig Descaling Solution.
- Bicarbonate Of Soda.
All of these items will get your coffee maker clean and can also be used to clean your needles.
Does Baking Soda Clean Keurig?
Yes, baking soda is a great overall cleaning substance for everything and not only your Keurig coffee maker. When using Baking soda, premix a 25% baking soda and 75% fresh water solution and then add it to your water reservoir until it is full.
Run a descale cycle.
Is There A Cleaning Mode On Keurig?
Yes, it’s called the descale mode. Make sure your brewer is plugged in and powered down. Press and hold the 8 Oz and 12 Oz buttons for 3 seconds. When they start to flash, press brew button then begin cleaning your coffee maker.
How Many Times Do You Run Vinegar Through A Keurig?
I highly recommend that you run vinegar or another cleaning solution every other week, every 15 days, to ensure that you keep your coffee machine in optimal condition for brewing coffee.
Why Is My Keurig Not Working After Cleaning With Vinegar?
If your Keurig is not working after cleaning it with a vinegar, try running a second or third descaling cycle with a 50% white vinegar and clean water solution as you may have a particularly large build up of minerals causing blockages. Or perhaps you forgot to clean and unblock your needles.
Run a proper and complete cleaning cycle of your needles by opening up the brew head and poking around inside both needles with a paper clip or a fine needle.
Then with a 50% vinegar and 50% warm water (or hot water) solution, fill your needle maintenance tool with this solution and place it in the pod holder. Open and close the brew head 5 to 7 times.
Rinse well and check the functionality of your machine.
How Much Vinegar Should I Run Through My Keurig?
There is no set quantity in terms of volume to use in your Keurig coffee maker. Simply use a 1:1 ratio of vinegar and water and fill your water tank to the max fill line with the solution and run a full descale cycle.
Final Thoughts – How To Clean Keurig Needle
Now that you know how to clean Keurig needle and get it properly clean and ensure that the tubes leading up to the needles are perfectly clean, all that is left for you to do is to perform the task regularly, perform the task with every descaling and deep clean that you perform.
It only adds an extra 5 min or so to your cleaning and goes a long way to ensuring your coffee maker is brewing perfect coffee every single time.
Join our fun and very friendly coffee community where we discuss all things related to coffee. Find us on Facebook/Meta.
Derek Marshall
Derek Marshall, a certified barista by the Specialty Coffee Association possesses over two decades of experience in specialty coffee shops. He holds professional certifications for coffee brewing and barista skills. Derek is also an author with authoritative books covering various coffee topics including specialty coffee, sustainability and coffee, coffee brewing, coffee recipes, coffee cocktails and books focusing on Brazilian coffee, Vietnamese coffee, Indonesian coffee and Malaysian coffee. As a barista for over two decades, Derek Marshall has worked in specialty coffee shops across the United Kingdom, Spain, Thailand, Malaysia, Cambodia, Indonesia, and Vietnam. His expertise extends to the distinct coffee cultures, specialty beverages, and brewing techniques of each nation. Functioning as a coffee consultant, Derek charges US$50 per hour. To learn more about Derek Marshall and Latte Love Brew, visit his About Me Page. For coffee inquiries, contact him at +34-639-410-375 or Derek@LatteLoveBrew.com, mentioning your name and location